


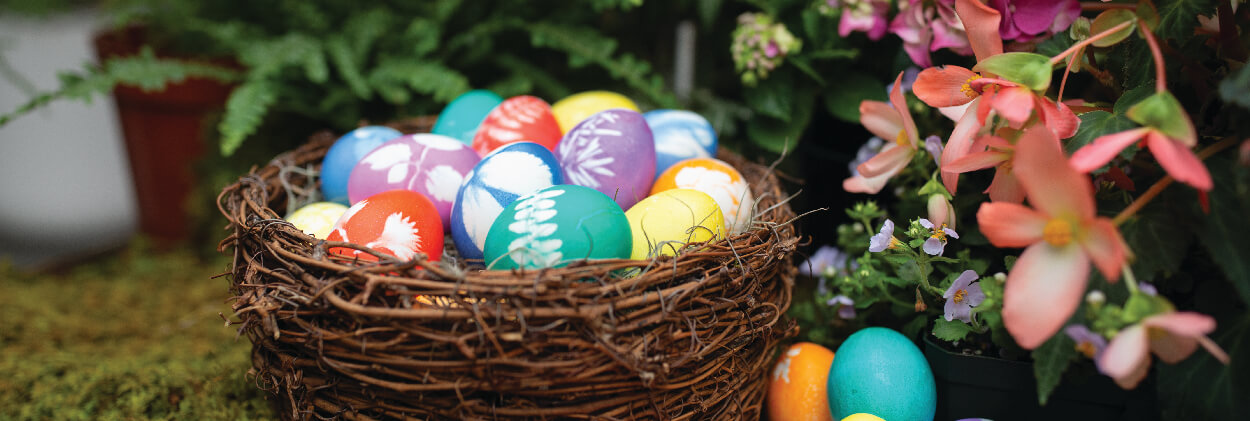
Celebrate Easter with botanical printed Easter eggs. Make your holiday memorable by using your favorite flowers and leaves to create one-of-a-kind dyed Easter eggs. This step-by-step guide will show you how!

MATERIALS:
- 1 Dozen (or more) white eggs
- Egg-dyeing kit with tablets and wire dipper
- Jars/vases
- Distilled white vinegar
- Panty hose
- Twist ties
- Flowers or leaves to imprint onto eggs
- Drying rack
- Paper towels
- Scissors
STEP 1: PREPARE YOUR EGGS

Gently place the eggs in a large pot and fill with cold water. Bring to a hard boil over medium heat and then cook for 10 minutes. Take out the eggs and allow to cool.
STEP 2: PREPARE YOUR DYES

Following the directions on the dye kit, drop 1 color tablet into each jar or vase. Add 1 tablespoon of vinegar and allow tablet to dissolve. Then, add 1/2 cup water at room temperature.
STEP 3: GATHER YOUR BOTANICALS
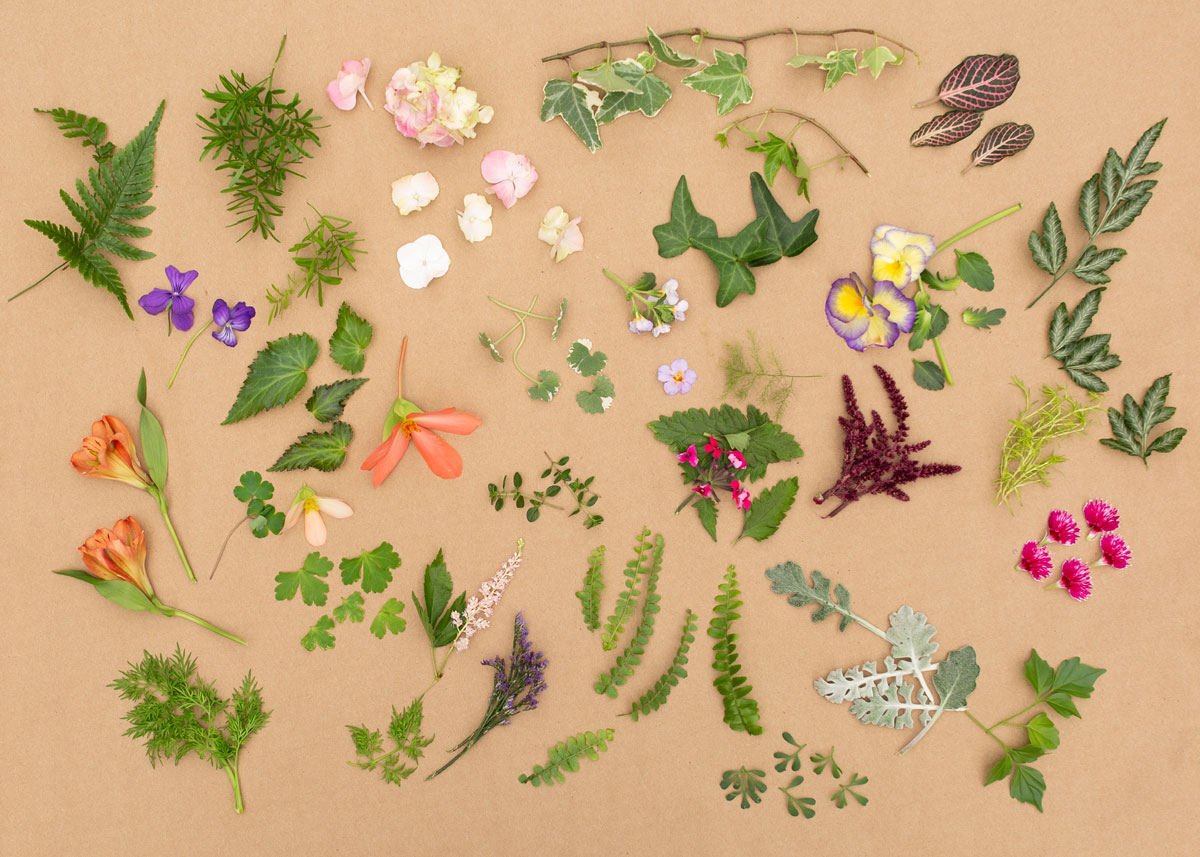
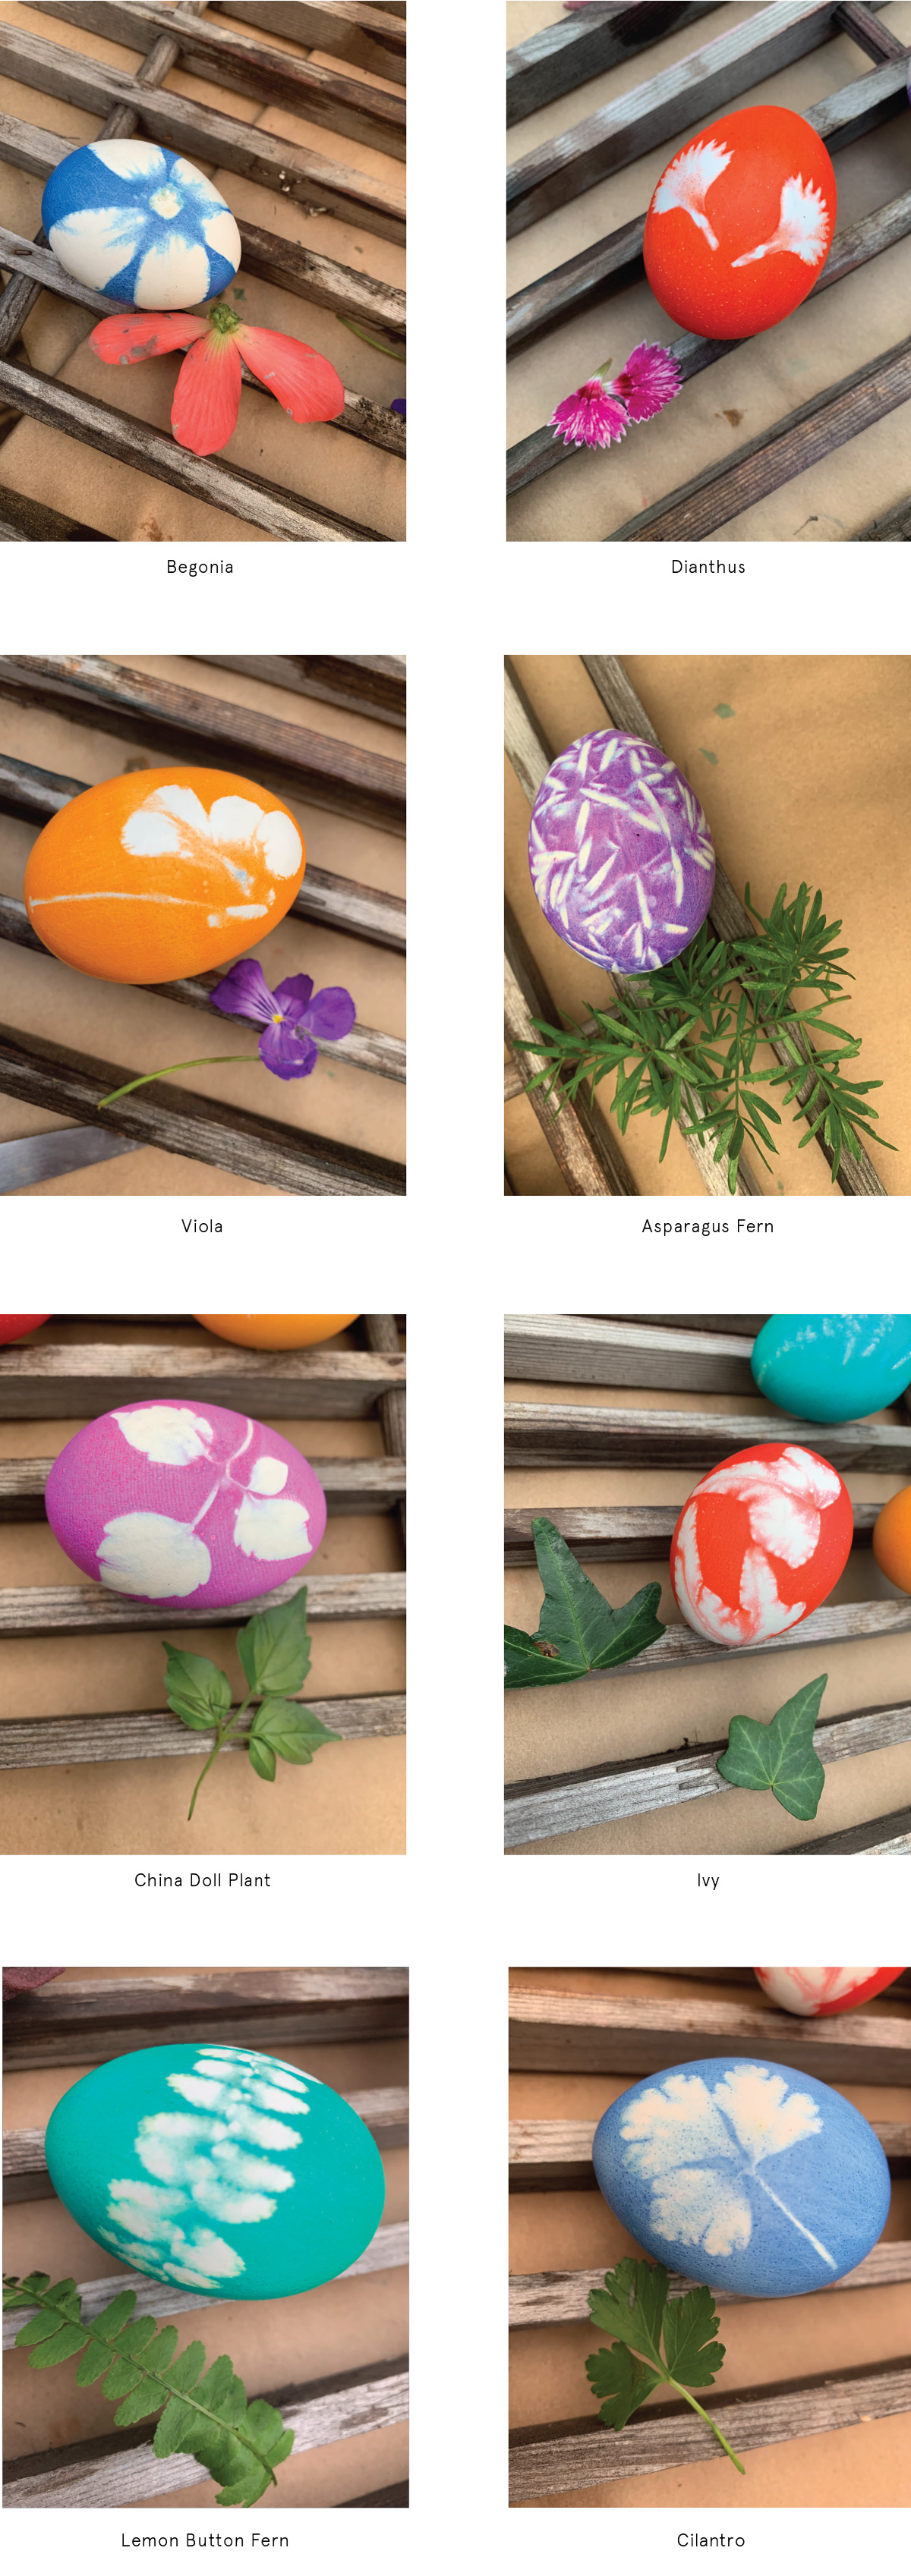
Look closely at the plants and flowers around you. Look at their intricate petals and leaves. Which ones do you think will leave a good imprint on your Easter eggs? Grab a basket and fill it up with little botanical treasures you’d like to experiment with.
STEP 4: CUT UP YOUR STOCKINGS
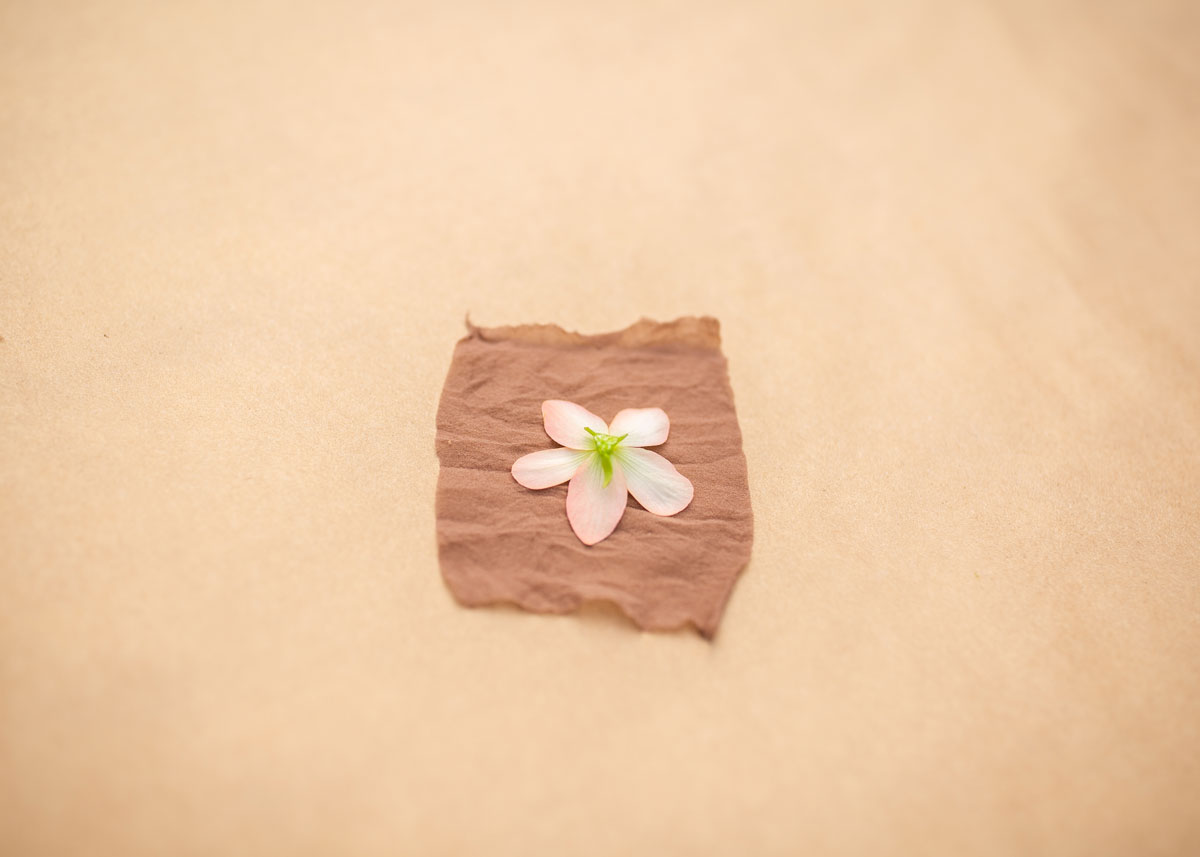
Got some old panty hose laying around? Cut it up into 4-inch squares. They should just be 1 layer of hose, not doubled. Lay the hose onto a flat surface and place a flower or leaf onto it.
STEP 5: PLACE YOUR EGG
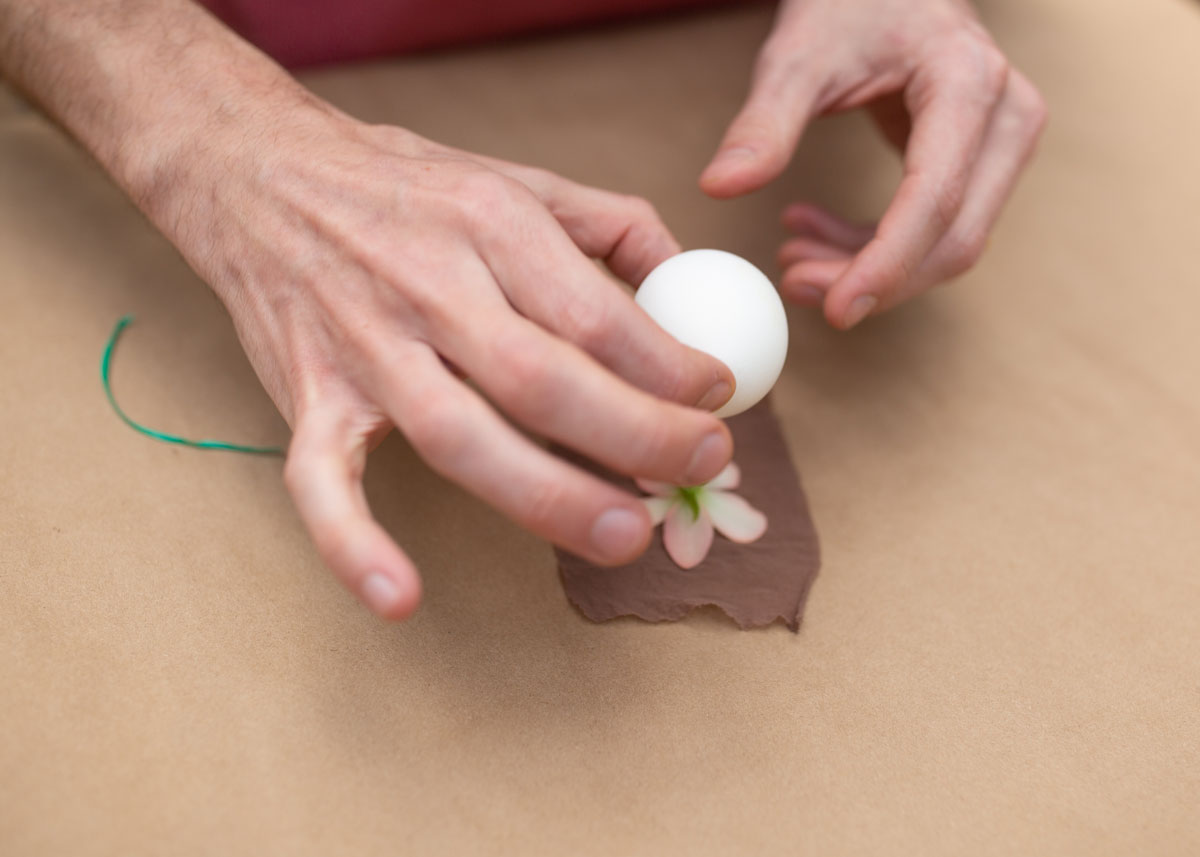
Adjust the flower petals or leaves until you have achieved the look you’re going for. Don’t rush this part. Think about the way you will lay the egg and how the leaves or flowers will fill up its white surface.
=
STEP 6: TWIST YOUR STOCKINGS
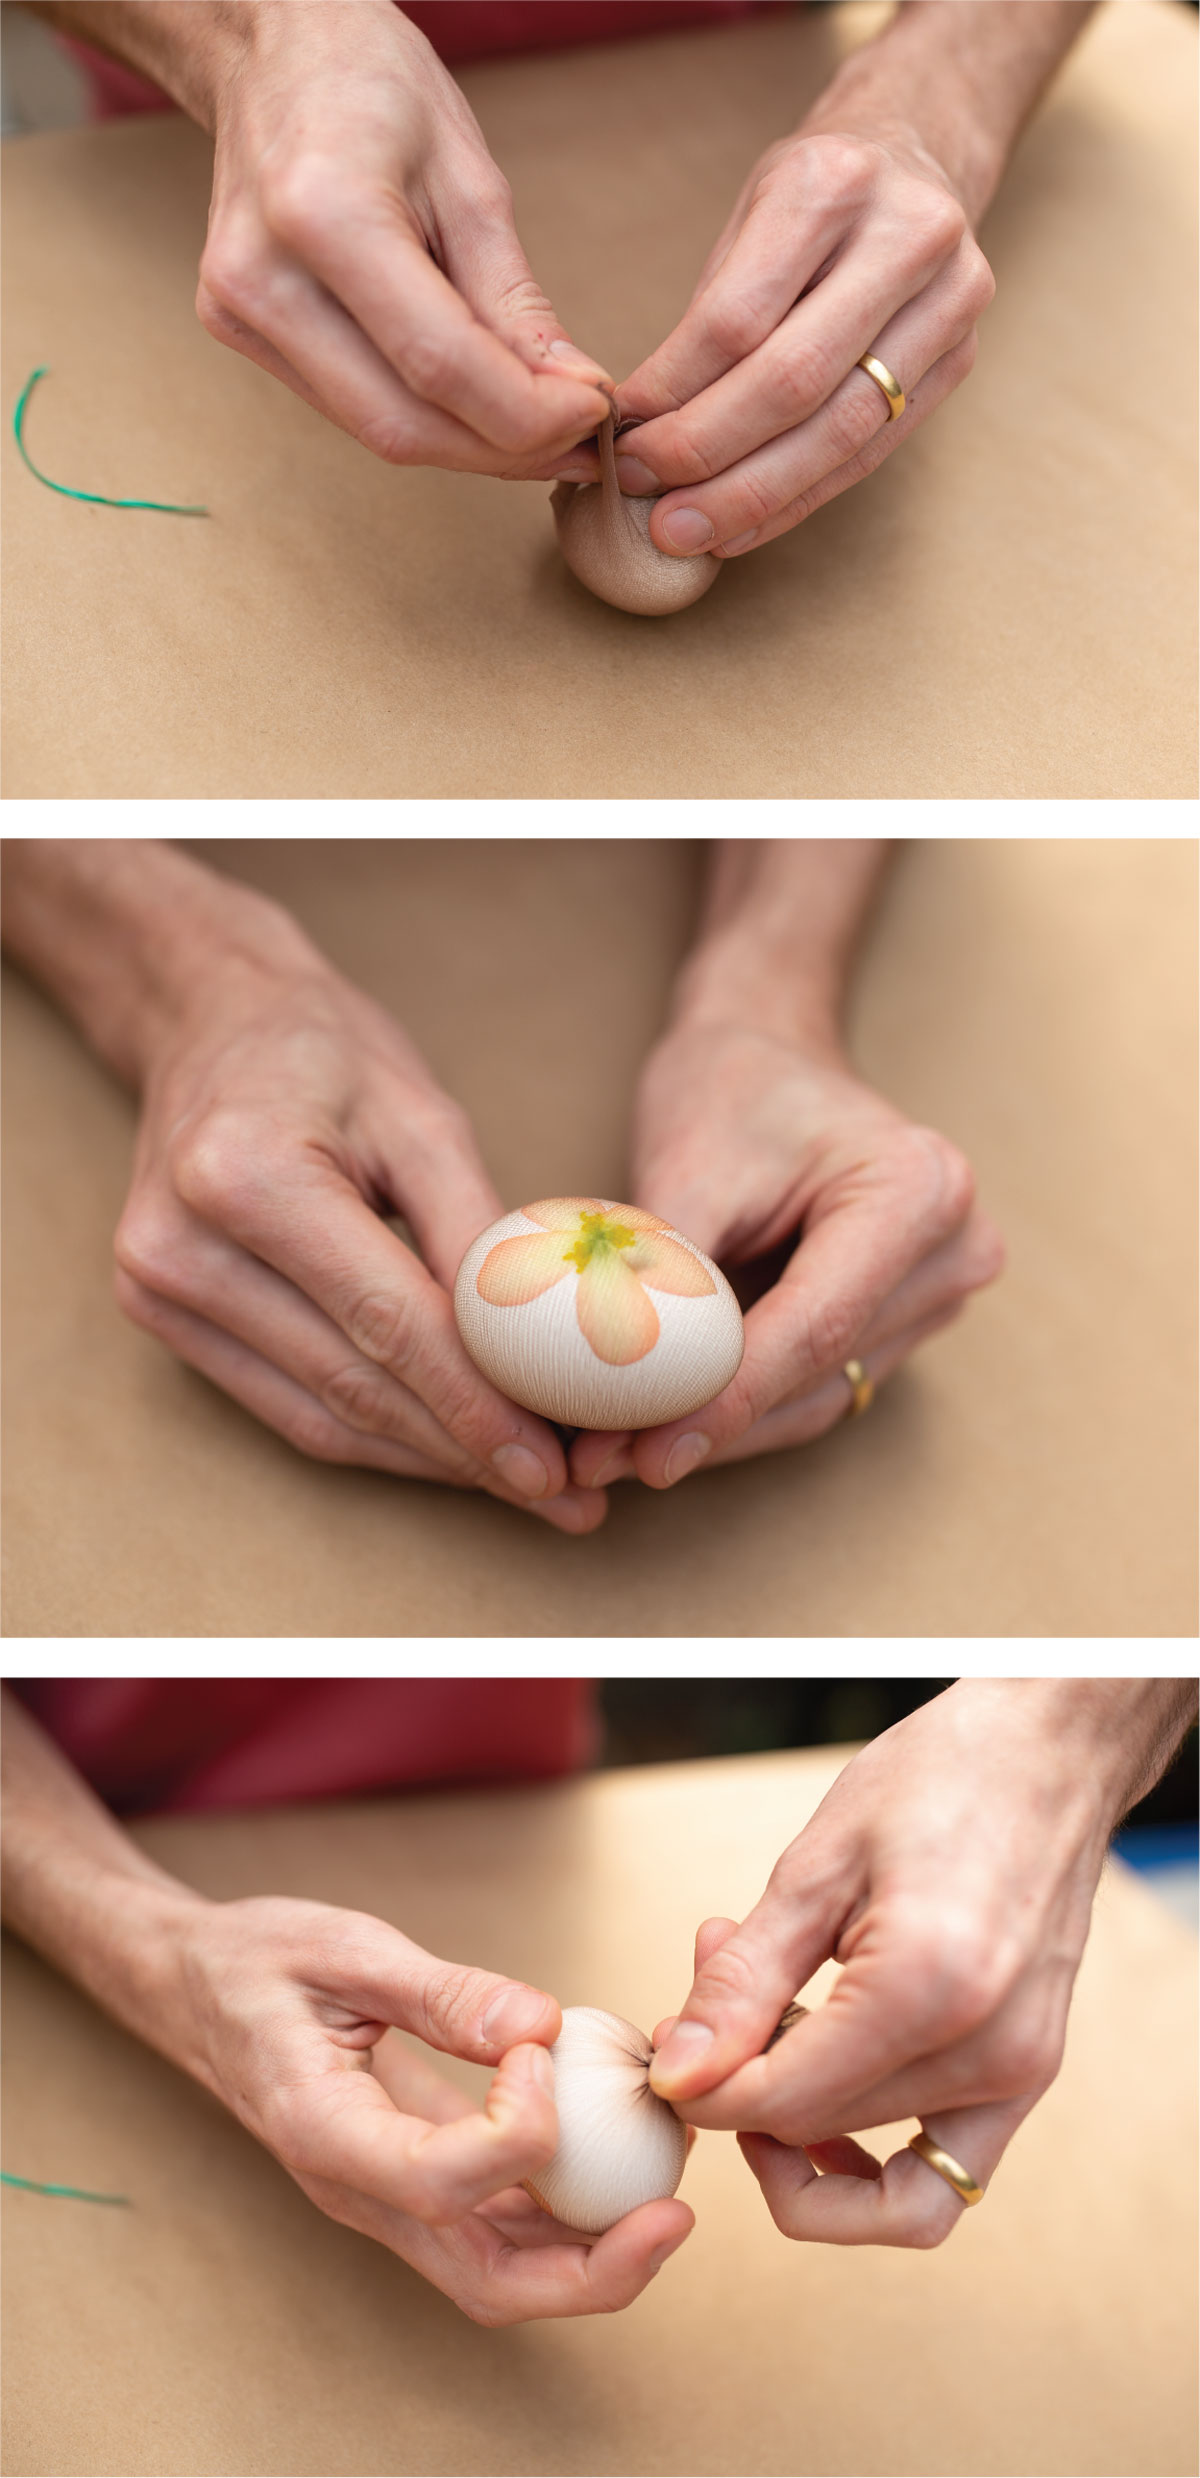
Once the egg is in place, gently wrap it in the panty hose so that the leaves or flower petals stay intact. Pull the hose tight so that the dye will easily go through to the egg, being careful not to roll delicate flower petals into a jumble. Then, give it a good twist.
STEP 7: TIE IT UP!
Secure the wrapped egg with a twist tie. Make sure the hose doesn’t loosen in the process.
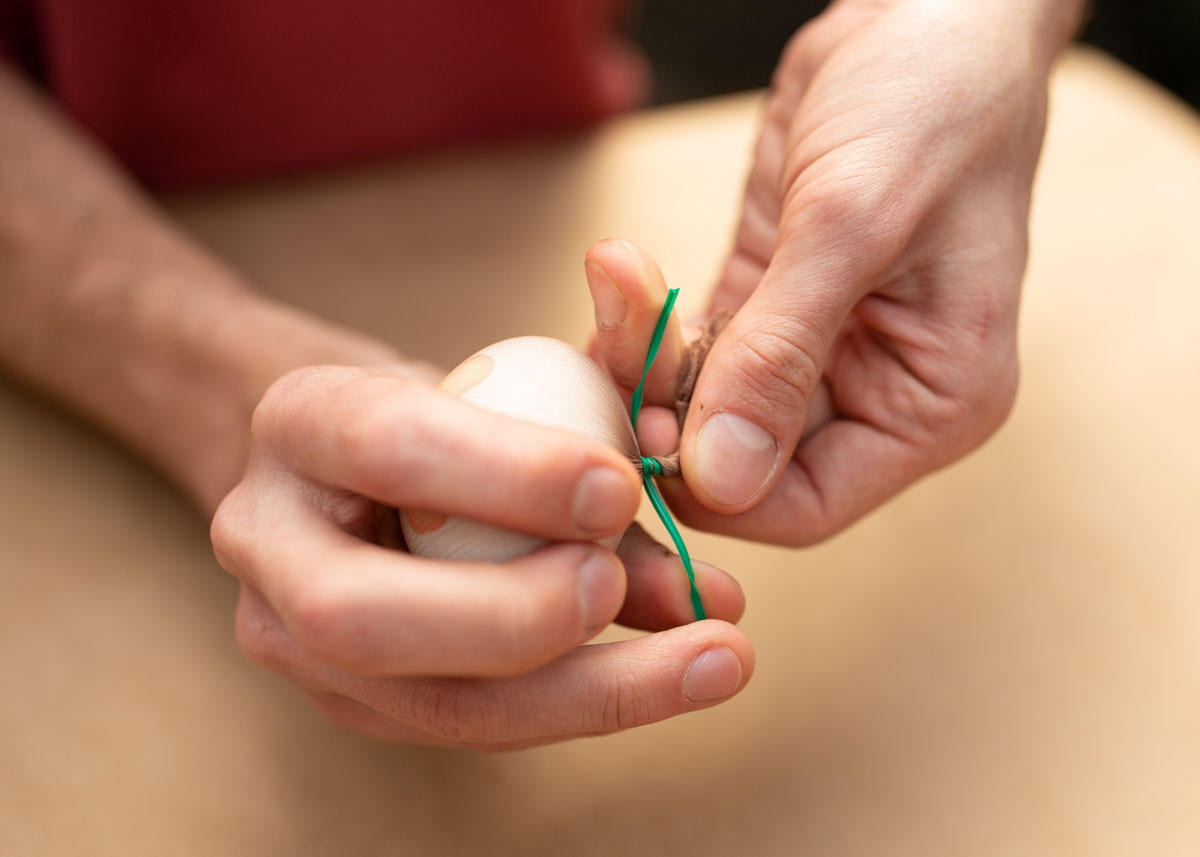
STEP 8: DUNK & WAIT
Drop the egg into the dye with the botanical design facedown. Allow to soak for desired length of time. Set a timer to keep track of how long it has been soaking.
STEP 9: WAIT A LITTLE LONGER

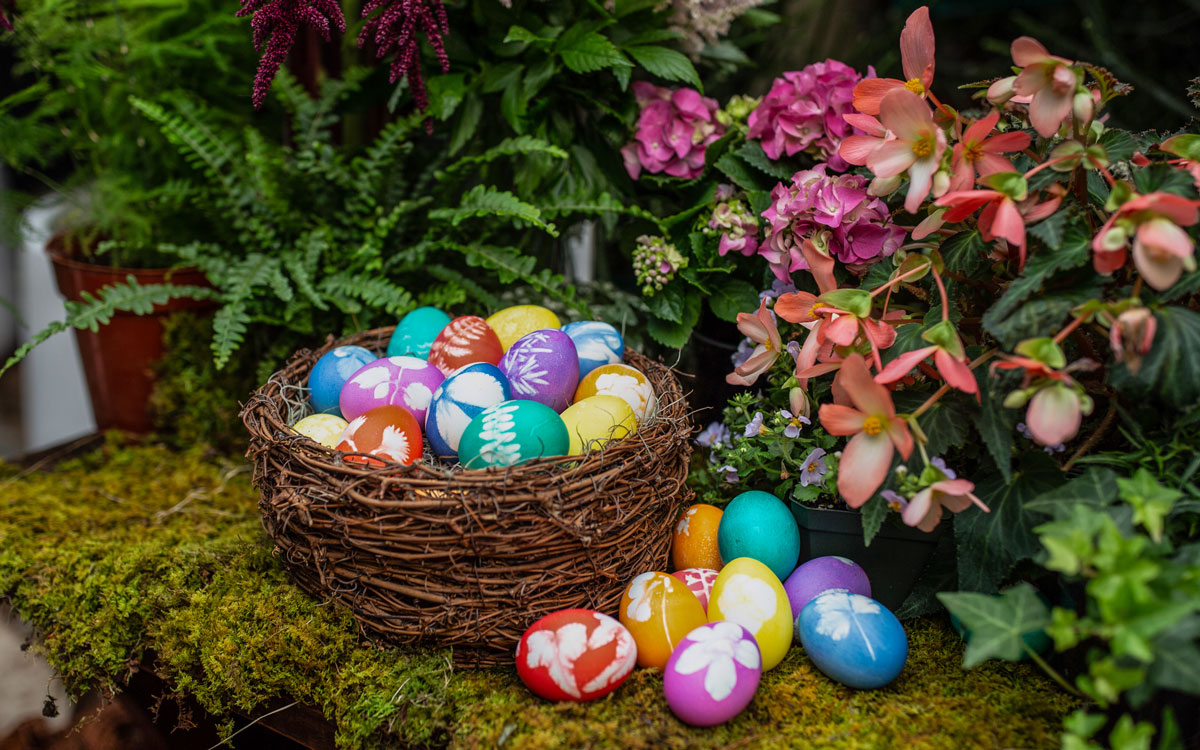
The longer they sit, the richer their colors will be! We gave ours 30 minutes…
STEP 10: DRY THEM A BIT

Retrieve the eggs with the wire dipper and place on a drying rack. Wipe off the dipper after each egg to ensure dyes do not mix. Allow to dry for at least 30 minutes to minimize excess running into the design. Be patient! You’re almost there!
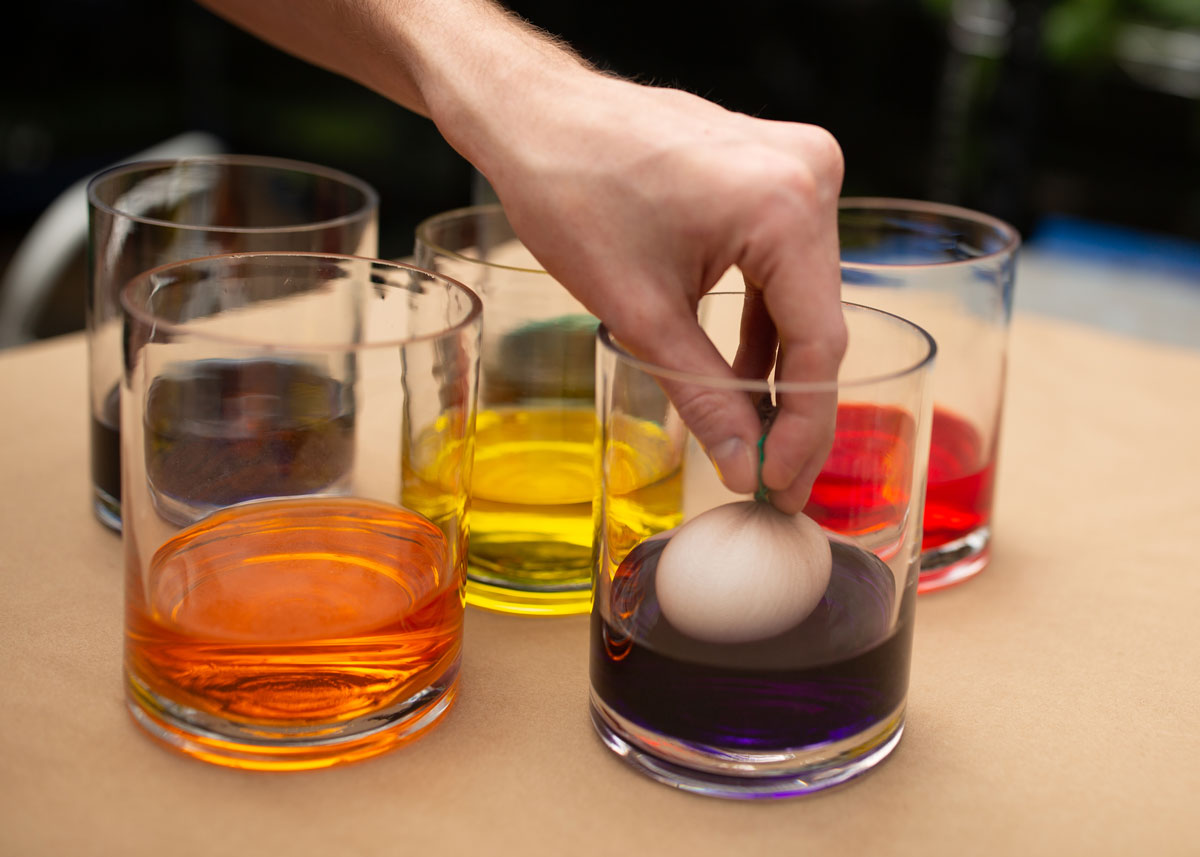
STEP 11: UNWRAP YOUR EGGS
Gently dry off any excess dye from the panty hose with a paper towel, making sure the flower petals or leaves do not move too much. Use scissors to cut below the twist tie and remove panty hose from the egg.
STEP 12: CHECK OUT YOUR DESIGN
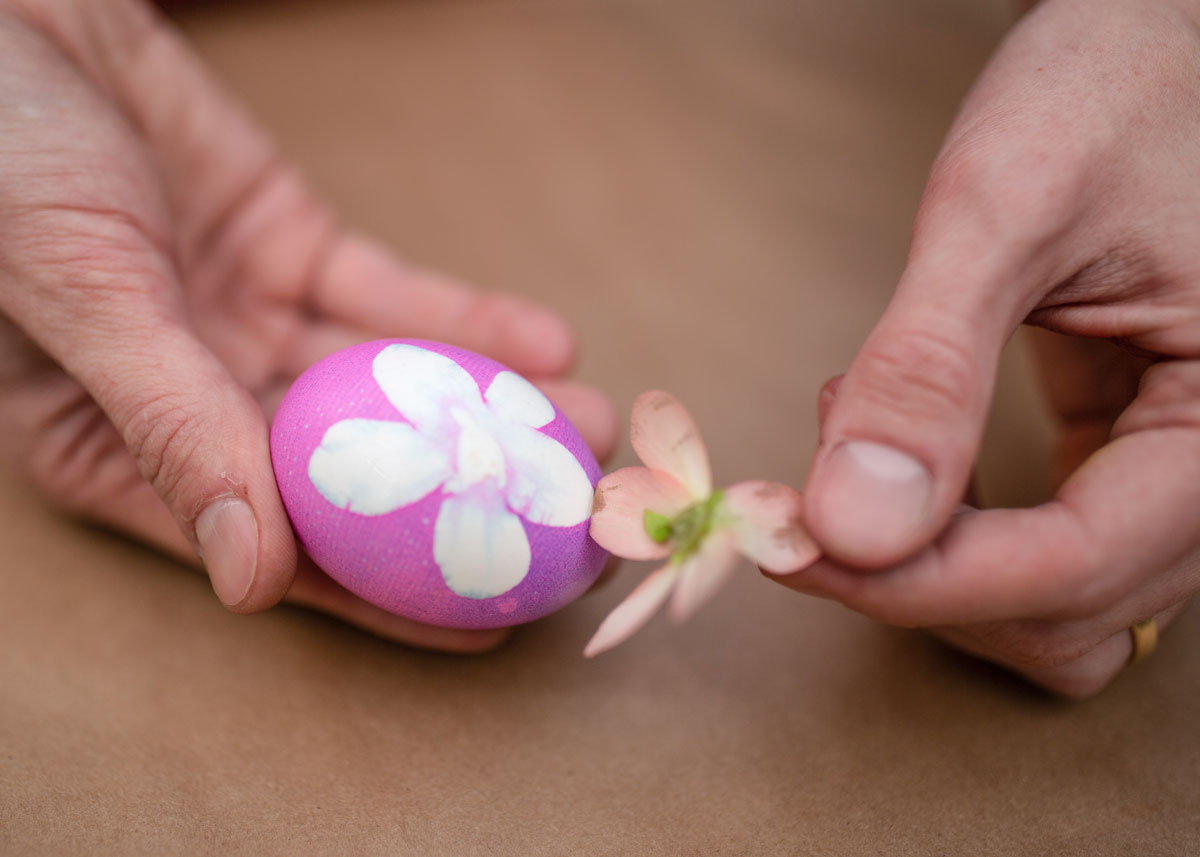
Remove the flower or leaf and pat the egg dry with a paper towel. How did it turn out? Some flowers and leaves work better than others. The best ones seem to have defined negative spaces near the interior or stem.
Check out the designs from the botanicals we used: